The Best Strength Training Exercises For Beginners
Do you want to become the strongest, leanest version of yourself yet? Strength training is the fun, life affirming protocol you need to get you there.
Your body was made to push, pull, tow, and throw objects. It responds well to performing as nature intended, rewarding you with a powerful lean physique – and an impenetrable mindset. Experts say it could even help you live longer!
There’s more to lifting weights than bullish brute strength alone. It’s probably the single, most complete method of preparing your body and mind for whatever the world has in store. Did we mention it can help you look better without clothes on? Yes, there’s that side to it too – in case you were wondering.
So if you’re new to strength training, we’ve got you covered. We’ll supply the step-by-step instructions; you just need to go out there and do it.
This guide will teach you how to hit all the best beginner strength exercises to get you started.
We’ll also reveal exactly what it takes to turn those lifts into solid, measurable strength gains. We don’t go full lab-coat and clipboard with the science, though. There’s just enough for you to get the most out of every workout.
No need to chalk up those hands just yet! Let’s find out exactly what strength training is first.
What is strength training?
Simply put, strength training is moving any weight from point A to B. Don’t be fooled that it has to be all about barbells though. Bodyweight workouts still constitute as strength training, meaning you can do it anywhere.
The second aspect to strength training is progressive overload. We’ll dig a little deeper into this later, but for now, think of it as making training progressively harder. If your workouts were laid horizontally on a graph, you’d be moving diagonally to the top corner.
One of the best things about strength training is the unlimited avenues you can go down. You’ve got the traditional barbell systems, such as 5×5 and 5/3/1; tailored, sport specific strength plans; and the awkward style of strongman training.
All systems rely on moving heavier objects with the mission to get stronger. Some focus on building muscle and amplifying your size gains too.
Why strength training?
There genuinely isn’t a reason why you shouldn’t strength train. Unless you’ve been outright told no by your doctor, the benefits outweigh any tiny cons by a ton.
Let’s make one thing clear – strength training can literally benefit your whole life.
According to a huge meta-analysis of approximately two million people, stronger individuals generally live longer1. That’s all regardless of age and follow up period too.
So, just by getting out there and fixing up your strength, you could extend your lifespan.
Experts say strength training can even prevent heart disease and obesity – two of today’s biggest killers2. Further research has also found that exercise, especially lifting, can also improve mental health345.
Strength training also slows down sarcopenia (muscle deterioration), allowing aging people to keep their independence6. Did we mention it also boosts bone density?7 That’s a reduced risk of fractures from falls too.
If you need anything more to get under the bar, let it be this: Strength training is the best for building muscle, while burning fat. Yes, seriously, both together.
Used alongside Instant Knockout Cut, strength training can help you cut the fat while maintaining lean muscle gains. Packed with all the ingredients you need to stay energized for heavy strength training sessions, it powers up your metabolism to naturally help you use more fuel and helps to control hunger cravings so you can fight excess fat and get fighting fit.
Discover more about Instant Knockout Cut here.
Translate that as a leaner, tighter physique for your in-gym efforts. You can add a touch of size too, if that’s what you’re after.
What are the best strength training exercises for beginners?
By now you understand that life’s for lifting. So, let’s take the first step in mastering the best strength exercises for beginners.

Exercise 1 – Pushups
Muscles worked: Chest, shoulders, triceps, core
- Set yourself up in a top plank. Your palms should be flat on the floor and in line with your shoulders; your pelvis pulled in and back flat; and your neck should be in a neutral position. Imagine your body like a long, flat board anchored to the floor by your toes.
- Pull your shoulders back and down – they should now feel more stable. Don’t roll your shoulders forward or drop your head at any point.
- Brace your core and bend your elbows to lower your chest to the floor. Your elbows should be pointed backward a touch and your back kept straight.
- Once you’re at the bottom, press through your palms and reverse step 2. Keep your back straight and brace your core on the ascent.
If you’re finding the pushup too challenging, you can modify it. Try the exact same movements, but from your knees instead. Use this modified version to help you work up to the full thing.
Exercise 2 – Bodyweight squat
Muscles worked: Legs, core and back
- Stand with your feet just wider than shoulder-width. Now, point your toes out slightly, no more than 20 degrees.
- Brace your core.
- Sit back and down, as if you were descending into a low chair. Keep your weight balanced over your mid-foot and heel throughout the whole movement. Your knees should also stay in line with your toes and not cave inward. If you can’t stop this happening, don’t go down so low just yet.
- Take a second at the bottom before pushing back to the top with intention. It’s a myth that you need to go way past parallel to benefit from a squat, so go to wherever feels right. There’s no need to compromise good form for an extra inch of depth.
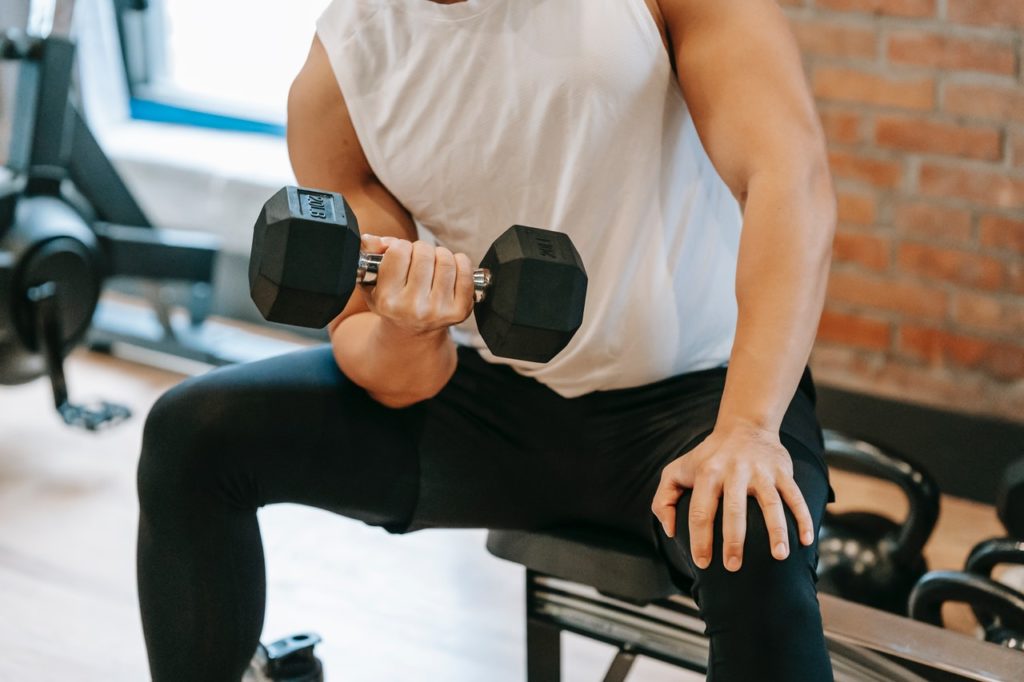
Exercise 3 – Dumbbell bicep curl
Muscles worked: Biceps, core
- Stand with your feet shoulder-width and facing forward. Brace your core, align your back, and let the dumbbell rest in your hand at the side of your body. Your back needs to stay straight for the whole of this exercise.
- Keep your elbow in as you curl the dumbbell upward, toward your chest.
- Let your forearm rotate so the back of your hand is facing away from you at the top of the movement. Try to use the bicep only to pull the weight, rather than swinging it up with momentum too. This is how you maintain proper form.
- Once the dumbbell is at the top, squeeze your bicep, then lower the weight back down. Use control throughout this entire process.
Exercise 4 – Dumbbell triceps extension
Muscles worked: Triceps, core
- Stand with your feet hip-width and facing forward. Bend at your hips in a hinge, brace your core for a straight back, and pull your elbow in. Now, let the forearm rest at 90 degrees with the dumbbell almost parallel to the floor.
- Keep your core braced and extend your elbow. This will cause the dumbbell to move backward and up in an arc. Brace your core throughout this move and try to isolate your triceps.
- Once your elbow is fully extended, squeeze your triceps, before bringing the dumbbell back to the start in a controlled arc.
Exercise 5 – Dumbbell forward lunge
Muscles worked: Legs, shoulders, core
- Set yourself up with feet hip-width apart and a dumbbell in each hand. Brace your core and keep your eyes looking forward throughout this entire exercise.
- Lunge forward until both knees create opposite 90-degree angles. Try to keep your knees in line with your toes, so they don’t collapse inward. There’s no need to touch your back knee on the ground either, just let it float an inch above it.
- Drive yourself back to the starting position by pushing off your front heel. Look to maintain your balance and that core braced while you move.
- Repeat steps 2 and 3 on the opposite leg or go again on the same side.
Exercise 6 – Goblet squat
Muscles worked – Legs, core, arms, and shoulders
- Stand with your feet just wider than shoulder-width. Now, grab a kettlebell or a dumbbell and hold it close to your chest. Point your elbows down as if you were holding a goblet – hence the name.
- Point your toes out slightly, no more than 20 degrees.
- Brace your core throughout the entire movement.
- Sit back and down, as if into a low chair. Keep your weight balanced over your mid-foot and heel throughout the whole movement. Try to make sure your knees stay in line with your toes too, so they don’t collapse inward. If you can’t stop this happening, don’t go down so low or consider using a lighter weight. The same applies for any kind of faults in your form.
- Take a second at the bottom before powerfully pushing back to the top. Like we said earlier, you don’t need to go way past parallel to benefit from a squat. Go to wherever is challenging without breaking down your form.
Exercise 7 – One arm dumbbell row
Muscles worked: Middle back
- Find a flat bench. Lay a dumbbell close to the side of it on the same side you’re stood.
- Stand next to the foot of the bench. Place your closest shin on the bottom of the bench so your foot is hanging off. Now, lean forward and put your same side arm on too for stability.
- Brace your core, reach down, and grab the dumbbell. Let it hang with your arm fully extended and back straight.
- Now, row the dumbbell up toward the side of your body, while maintaining a straight back. Try not to twist, swing, or pull the shoulder upward. You really want to isolate and activate the middle-back here, not your arms.
- At the top of the movement squeeze the middle back before lowering the dumbbell.
- Repeat steps 3 to 5 on the same side until the set is complete.
Exercise 8 – Romanian deadlift
Muscles worked: Legs (hamstrings), core, back, shoulders, forearms
- Grab a barbell or set of dumbbells and hold them at hip-height. Use a pronated grip so your palms are facing down at shoulder-width.
- Set your feet at hip-width, brace your core, and hold your neck in alignment. Pull your shoulders back and let your back arch just slightly.
- Lower the weights in your hand(s) by shifting your hips backward; while keeping your core tight, head slightly up, and shoulders rolled back. Imagine you’re sticking your butt out and closing your hips like a hinge.
- Keep lowering the bar(s) until you reach the full-length of your hamstring’s flexibility. You’ll feel them pull you to a natural stop and there’s no need to force them past this spot.
- Drive the hips forward and bring the barbell back up your body. Try to keep the barbell close to yourself throughout this whole exercise.

Exercise 9 – Barbell bench press (medium grip)
Muscles worked: Chest, triceps, core
Set up:
- Before putting any weight on the bar, lay underneath it on a flat bench. Line the barbell up so it’s directly above your eyeline.
- Now, reach up and grab the empty bar with your hand just outside shoulder-width. When you un-rack and lower it, the bar should touch the bottom portion of your sternum, just under the nipple line. At this bottom position your elbows should be bent at 90-degrees.
- If they’re wider, bring your hands together slightly. If they’re tighter than 90, move your hands out a bit. When you’ve found that right angle, you’ve got your grip.
- Rack the bar and load up the weights evenly on both sides.
Barbell bench press (medium grip):
- Using your medium grip set-up, grab the bar and press it from the rack. Aim to keep your wrists slightly angled – so not fully bent back or straight. Keep your arms locked out for a moment. Take a deep breath in and brace your core.
- Lower the bar slowly to the spot between the bottom of your sternum and the nipple line. Keep your shoulders pulled back into their socket. If you feel them pinching, try move the barbell in a straight line toward the bottom of your chest, not up toward your shoulders. Look to lower the weight in a 2:1 ratio – so that pressing the bar back takes half as long.
- When the barbell has touched down on your chest, breathe out, and press it back to the top position. Actively imagine you’re pushing yourself away from the bar and back into the bench. This helps you to stabilize your position and perform a smoother lift.
Tip: Don’t bounce the bar off your chest. While this feels good and makes the lift easier, you still lose control for a second or two. Stick with a lighter weight rather than bouncing a loaded iron bar off your ribcage.
Also, if you’re lifting a heavy weight or are brand new to bench pressing, ask for a spot. This person will stand above you and guide the bar up and down. They won’t do any of the work, but they’ll be there to help if you lose control or can’t complete the rep.
Given the intricacies of the barbell squat and deadlift, they’re best saved for now. But if you’re eager to learn either, we recommend hiring a reputable strength coach. Nothing will get you strong quite like this infamous duo! A great coach could have you hitting new PRs in no time.
The importance of progressive overload
You don’t always have to hire somebody to start setting records, though. All you need is the strength seeker’s not-so-secret weapon – progressive overload.
We touched on progressive overload earlier, but definitely didn’t do it all justice. So, stick around, because this is really what you need to know.
First developed to rehab soldiers during World War II8, progressive overload has become the backbone of resistance training. The fundamental idea is that you, the lifter, increase your exercise demands over time, ultimately forcing your body to adapt.
Why you need it
If you don’t employ progressive overload, your body becomes used to the tension it’s exposed to. At first you might adapt, but then you’ll eventually catch up to your old workout routine.
It’s kind of like re-sitting the same year at school over and over again. Are you going to keep getting smarter? No – you’ll eventually hit a roadblock. You’ll become unchallenged, and eventually unchanged.
This might be in the case of workout to workout; or over weeks, months, and even years. Remember the graph we spoke about earlier? Picture time running linear across the bottom, and the demands of your workout ascending vertically.
As time goes on, what your workout asks for gets higher, and your progress moves toward the top right-hand corner. Sometimes it’ll take a shift downward during planned de-load weeks too.
Constantly increasing what you’re asking of your body signals that adaptations need to happen. As a result, your muscle can grow back stronger, connective tissue becomes tougher, and your bones denser. It can also cause muscular hypertrophy – aka size gains.
Progressive overload in action
So, how do you do it? First of all, start at a very comfortable weight. As a beginner you need to build a base level of strength first and leave headroom for improvement. Plus, you can fix your form first before handling anything dangerous and heavy. You’ll use progressive overload from day dot.
Here are two tactics for employing progressive overload:
- Volume – Increase your overall volume load (reps x sets x weight) over time. You don’t need to boost all three factors; just ensure the end amount creeps up higher and higher. One example would be using a heavier weight but keeping with the same rep/set pattern. Alternatively, you could stick with the same weight, but add in extra reps or sets.
- Intensity – Hike-up the percentage of maximum output you’re working at. So, if you’re training at 70% of your all, move up to 75% or 80%. Most people track this using a percentage of their 1RM (one rep max). However, you can still use a percentage based on their rate of perceived exertion (RPE). Simply put, how hard are you pushing yourself out of 10?
Progressive overload is a priceless tool for getting stronger. But you definitely can have too much of a good thing – especially in the gym!
Tailor your training so it tapers off every six to eight weeks.
You might also want to lower the intensity for a week if your RPE is creeping up, but your weight/set/reps aren’t. Spot the warning signs of overtraining early and take a day or two off, then lower volume. The gym will be waiting when you’re rested.
The bottom line
Strength training could truly save your life. You’ve seen all the evidence yourself! So, you know we’re not exaggerating.
Follow the step-by-steps instructions in this guide to get to grips with the best beginner moves. Make your own workouts and have fun while doing it too. For size gains, look toward using 6-12 reps for each move with a lower weight. Alternatively, for denser muscles built for strength over size, stick to 1-6 reps.
Take as much rest as you need between sets and remember to progressively overload. Now you can chalk up and get after it! You’re ready.